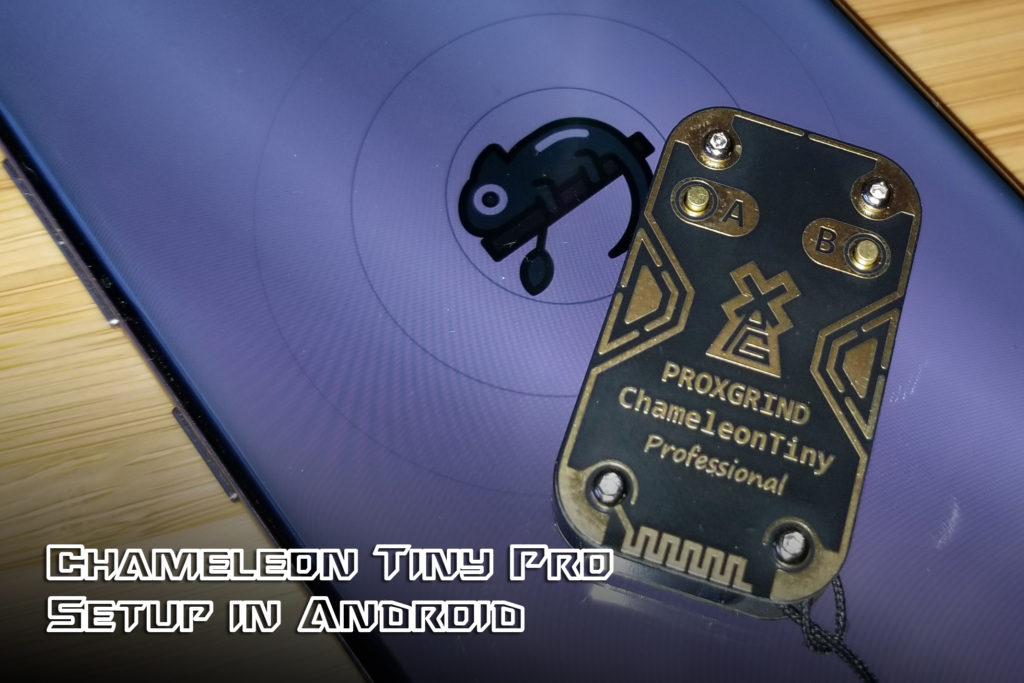
Aside from its extremely covert form factor, the primary advantage of the Chameleon Tiny Pro versus other variants on the market is the bluetooth module’s wireless connectivity to RRG’s intuitive and versatile Android app. In this toolkit tutorial, we will walk-through the process of setting up your Chameleon Tiny on Android OS for easy and discreet use via smart phone, tablet, or Chromebook.
Firmware Requirements
In order to pair your Chameleon Tiny to the Android app, you will need to have the device flashed with the RRG Chameleon Mini firmware fork – or a derivative branch like the experimental build that iceman maintains. The device comes from the factory with the most recent firmware release as of the date of manufacture, and the exact version can be verified by the app itself when attempting to connect via BLE. For more information on how to update or change firmware on the Tiny Pro, check out our article detailing device setup in Linux and Windows.
Installing the App
There are a few ways of obtaining the RRG Chameleon Android App and installing it to your mobile device. By far the easiest way is by going to Google Play and searching for Chameleon RFID Group, installing directly from the store. Make sure that you are downloading the correct app, as there are a few knock-off versions of this software. If you prefer to install the software manually from an .apk file, this can be found within the RRG Chameleon Mini firmware, which can be cloned or downloaded from GitHub.
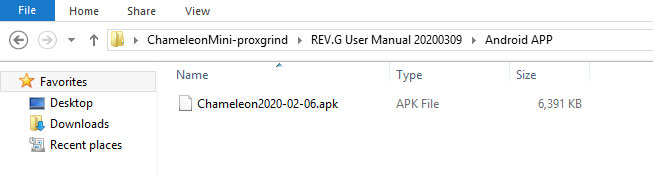
Figure 1A - Location of the Chameleon App's APK file location within the RRG firmware directory.

Figure 1B - The official app by RRG will look like this in Google Play.
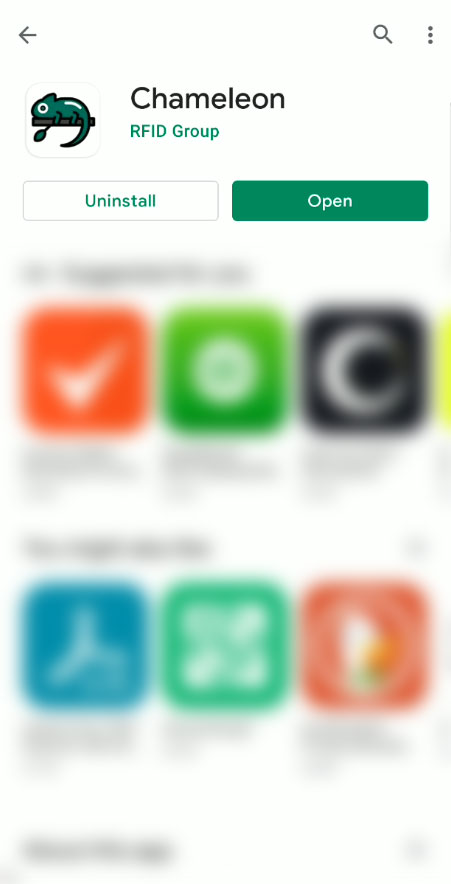
Figure 1C - Once installed, tap open to launch the app.
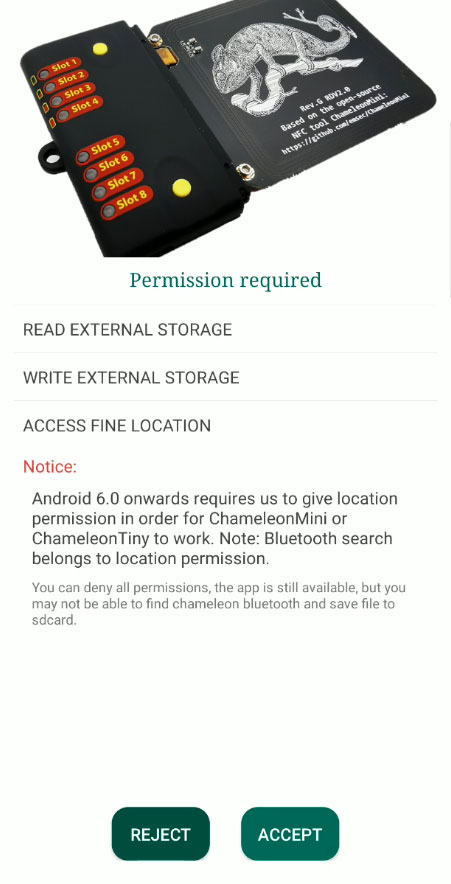
Figure 1D - Grant the app necessary permissions on first use.
Connecting to the Chameleon Tiny Pro
Once the app is installed to your Android device, simply tap the Chameleon icon to start the app. The software will load directly to a search screen as it scans for compatible hardware via BLE and USB. If trying to connect wireless you will need to press the B button on the right side of the Tiny Pro while the app is searching for devices to engage the bluetooth module and establish a connection. Viable hardware will show up on this screen as it is detected, labeled by MAC address. If connected via USB OTG, your Chameleon will show up with the name USB2UARTSerialDevice and a null MAC label. To connect to the app, simply tap the desired device and you will be brought into the minimalist but straightforward GUI.
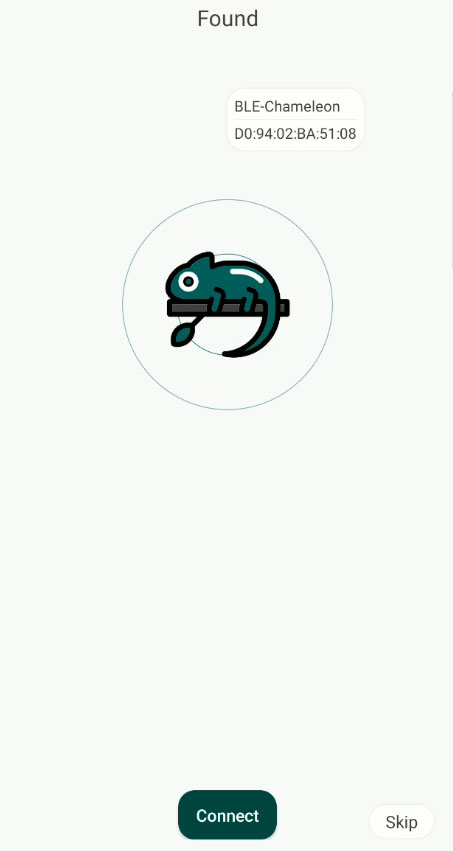
Figure 2A - The app will detect and display all compatible devices within range. Select the desired one and tap 'connect'.
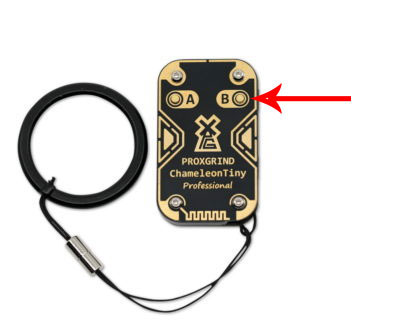
Figure 2B - Press the B button when attempting to connect.
Although the Chameleon Tiny Pro should connect with the Android app straight out of the box, there are a few common scenarios that can cause an error in this process. First, check that your android device has bluetooth enabled and that the Chameleon App has permission to utilize it. Now restart the app and make sure that you press the left button only once while the app is in the search screen – holding this button down too long or pressing the wrong button will not engage the BLE module for connection to the app. You may need to press the button a second time while the progress wheel is spinning in the UI, as the onboard BLE module may have timed out. If this does not result in a successful connection, charge the battery using the included USB cable and an AC adapter. The white LEDs on the back of the device will indicate charge level in 25% increments. If the device is fully charged and still not connecting to the app, it is most likely a firmware issue holding you back – refer to our guide to firmware flashing in Linux and Windows for more info on this topic.
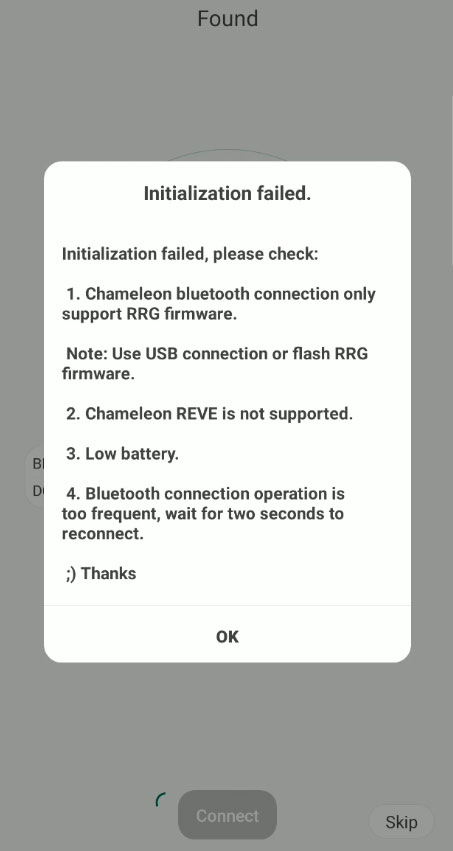
Figure 3 - Problems connecting may be attributed to a few different problems, and failure will trigger a trouble shooting message.
Overview of Functions
The GUI is divided between three screens: the Home/Function Screen; the Dump Screen; and the Device Screen. The Home Screen is where you will be interacting with the device via pre-programmed buttons or through the console text input. This screen is split between memory slot functions and full-device functions. Each slot can be used to store and operate on extracted card data, with common commands and workflows accessible at the tap of a button.
The Chameleon Tiny features 8 different memory slots capable of storing and emulating a wide variety of high-frequency RFID chip sets and protocols, allowing the user to cycle between and replay different stored cards on demand. Upon connecting to the device, the app will default to a slot overview format with a small block of at-glance card details, including protocol and UID. You can toggle to the full UI at the top of the screen to gain access to individual slot as well as device-level functions.

Figure 4A - Home Screen Slot Overview - A) Current Slot UID and Function; B) Slot On/Off Toggle; C) Go to Dump Menu; D) Go to Device Menu
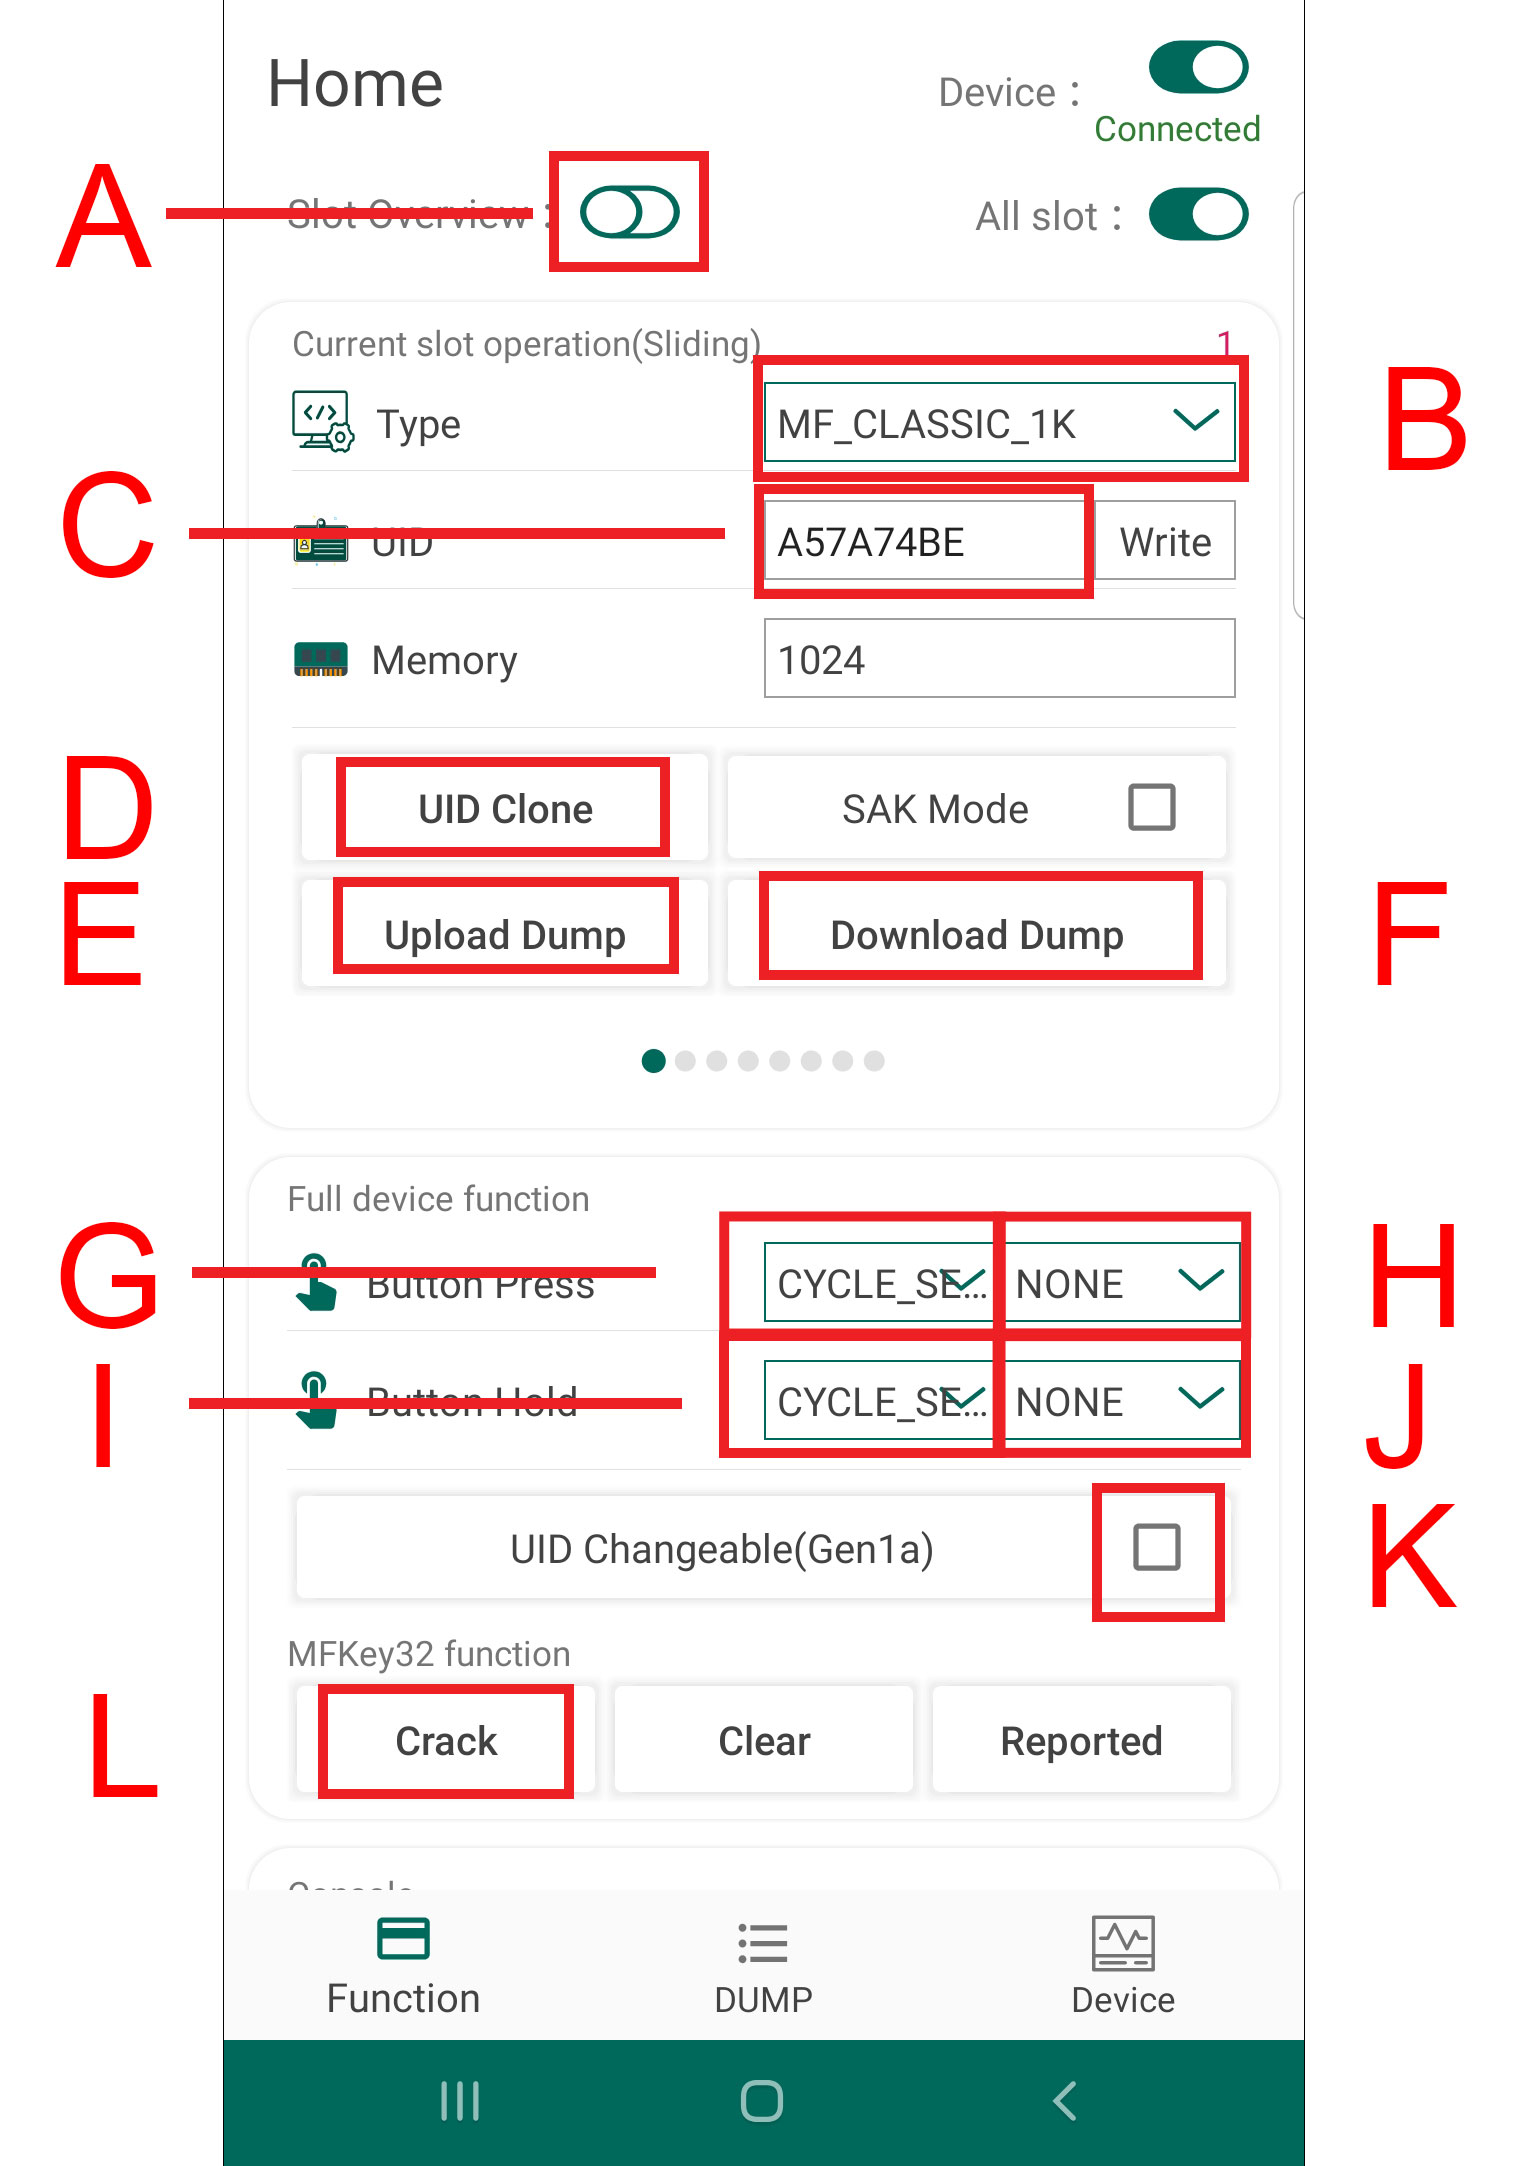
Figure 4B - Home Screen Slot Overview - A) Slot On/Off Toggle; B) Slot Function Menu; C) Slot UID; D) Clone UID from Target Tag; E) Dump Current Tag Data from Device Memory; F) Download Stored Tag Data to Device Memory; G) Left Button Press Function Menu; H) Right Button Press Function Menu; I) Left Button Hold Function Menu; J) Right Button Hold Function Menu; K) Enable Magic Card Mode; L) Crack Current Reader Data from Device Memory
The app UI provides a set of slot-specific commands available at the push of a button and allows the user to switch between slots by swiping this block left or right and even gives you the ability to name the slot with an alias for easier tracking. Below this set is a section for full device functions, such as programming the left and right button operations for both a short press and holding the button down for even more discreet standalone use of Chameleon Mini in field engagements. This section also features a console input to manually issue commands to the device as if you were dialing in through TTY as well as an xmodem connection for uploading and downloading card data to the hardware.
For nearly every application and workflow, the most useful button is definitely Clone UID, which triggers the device to scan its entire range of HF protocols in order to identify and extract the tag’s unique ID number (UID). This process is also useful in identifying the protocol used by the tag, as it will automatically update the tag type field of the slot info block with the correct selection. In addition to extracting and emulating existing card data, it is also possible to create novel tags by manually assigning values to the slot’s parameters.
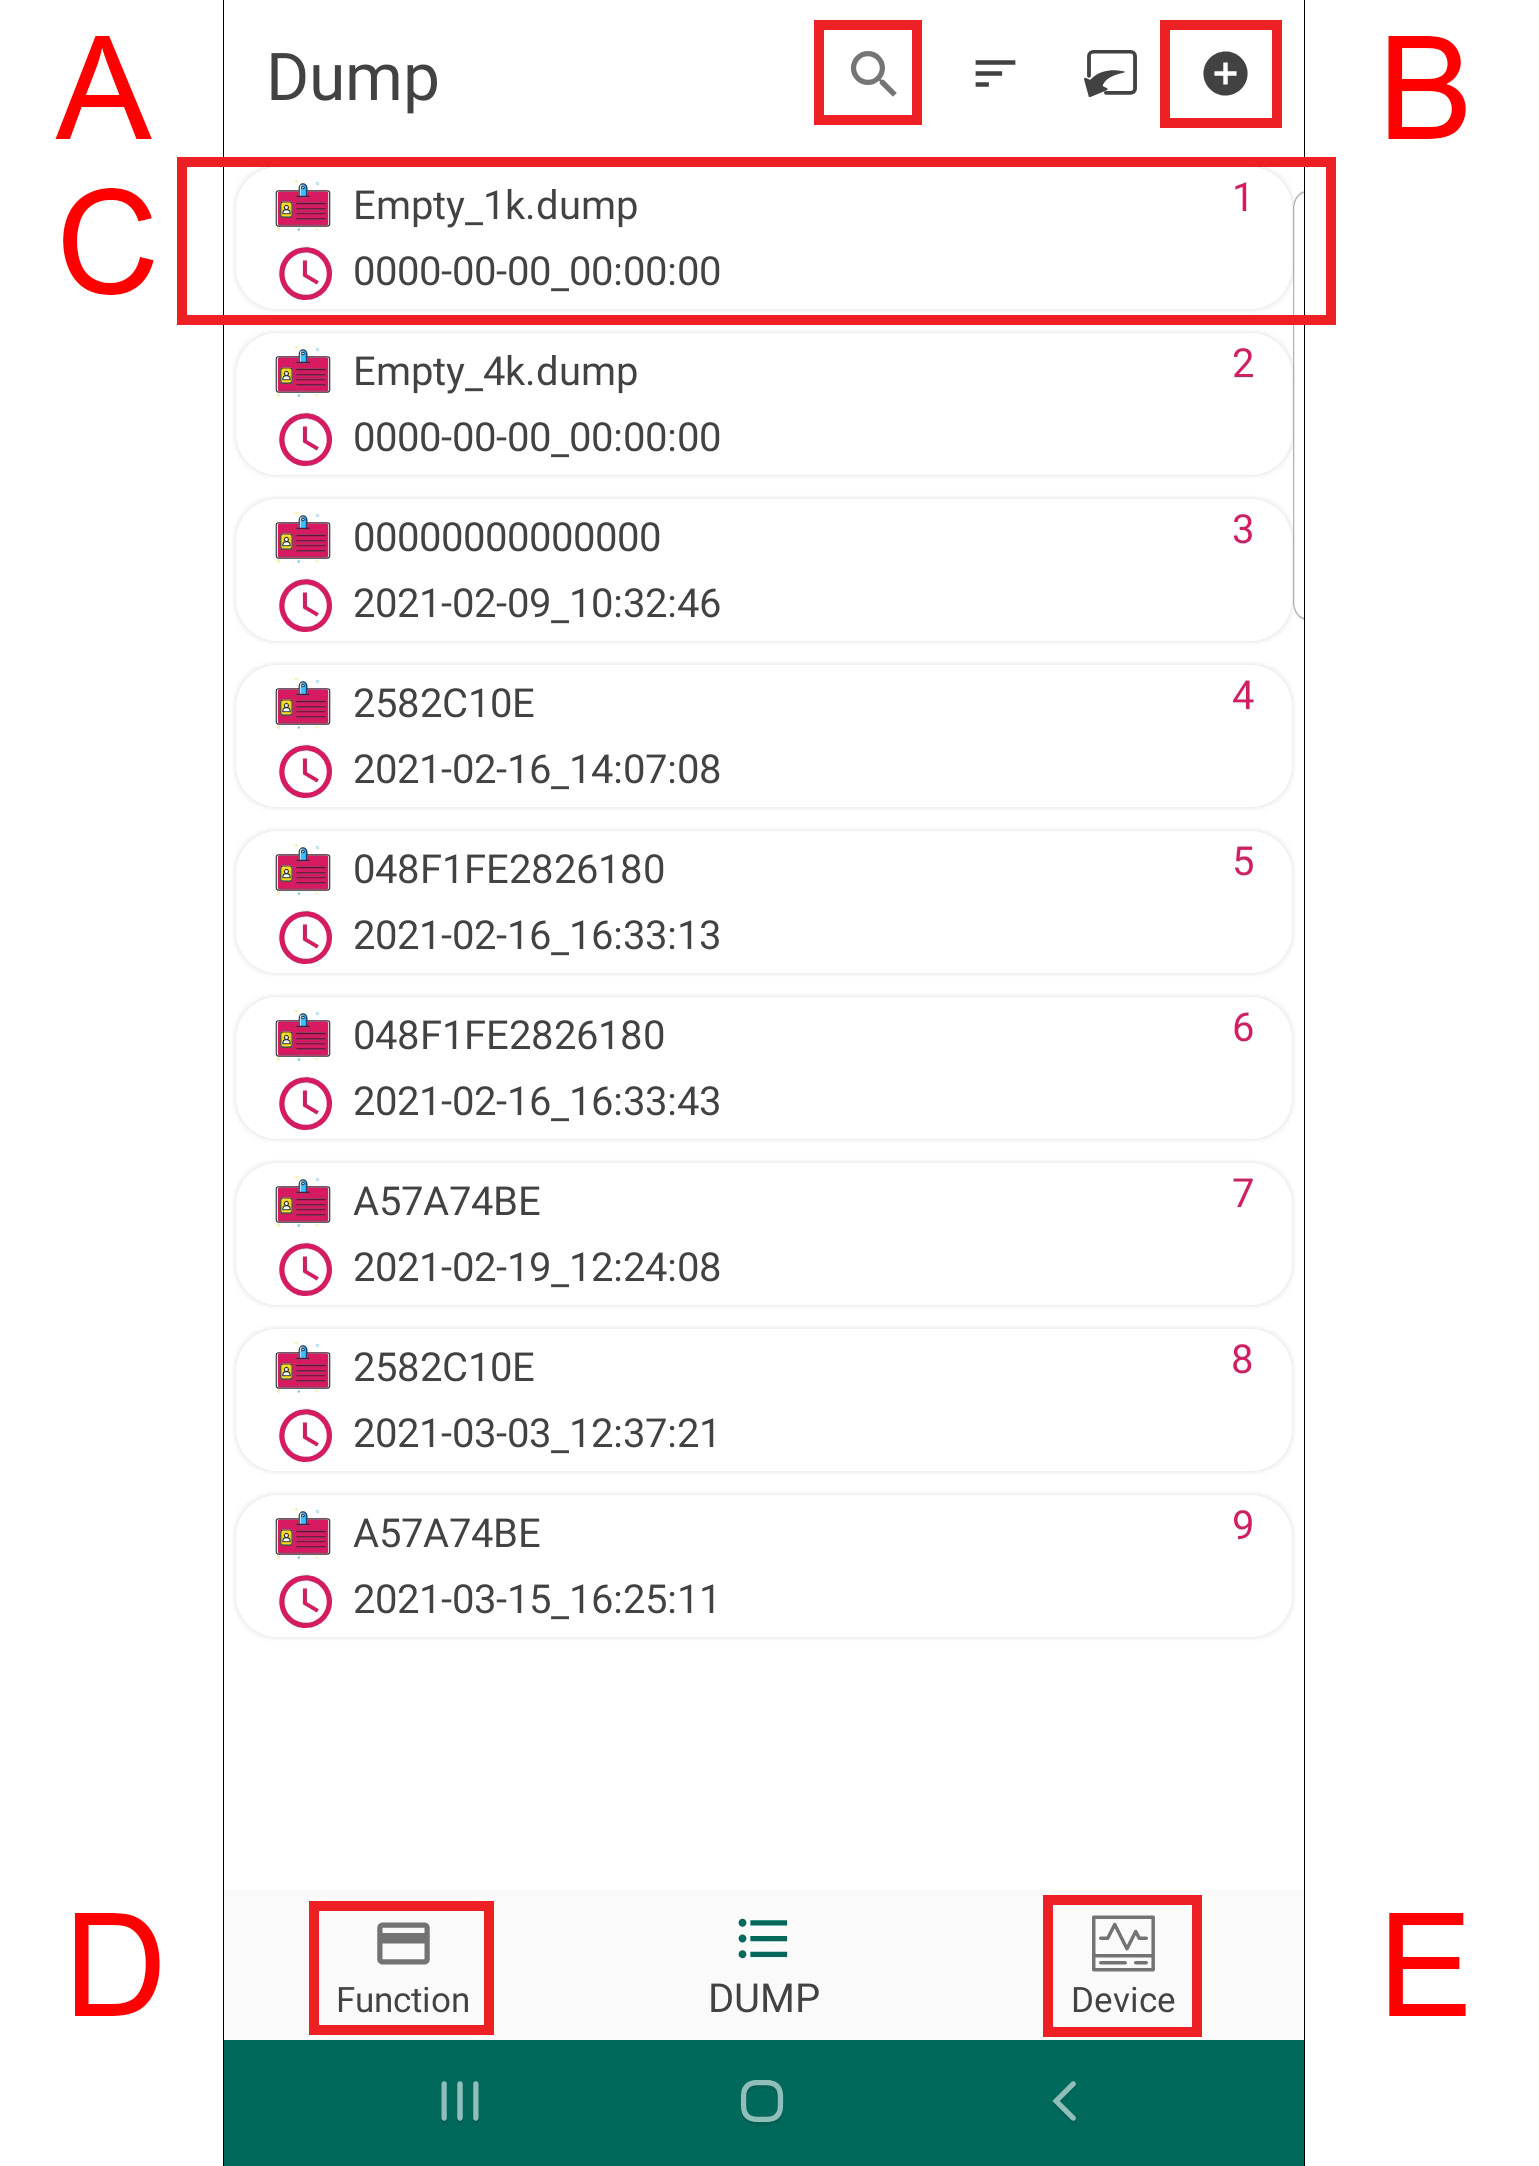
Figure 5 - Dump Screen - A) Search Stored Dump Files; B) Import Dump File; C) Select Dump File; D) Go to Home/Function Screen; E) Go to Device Screen
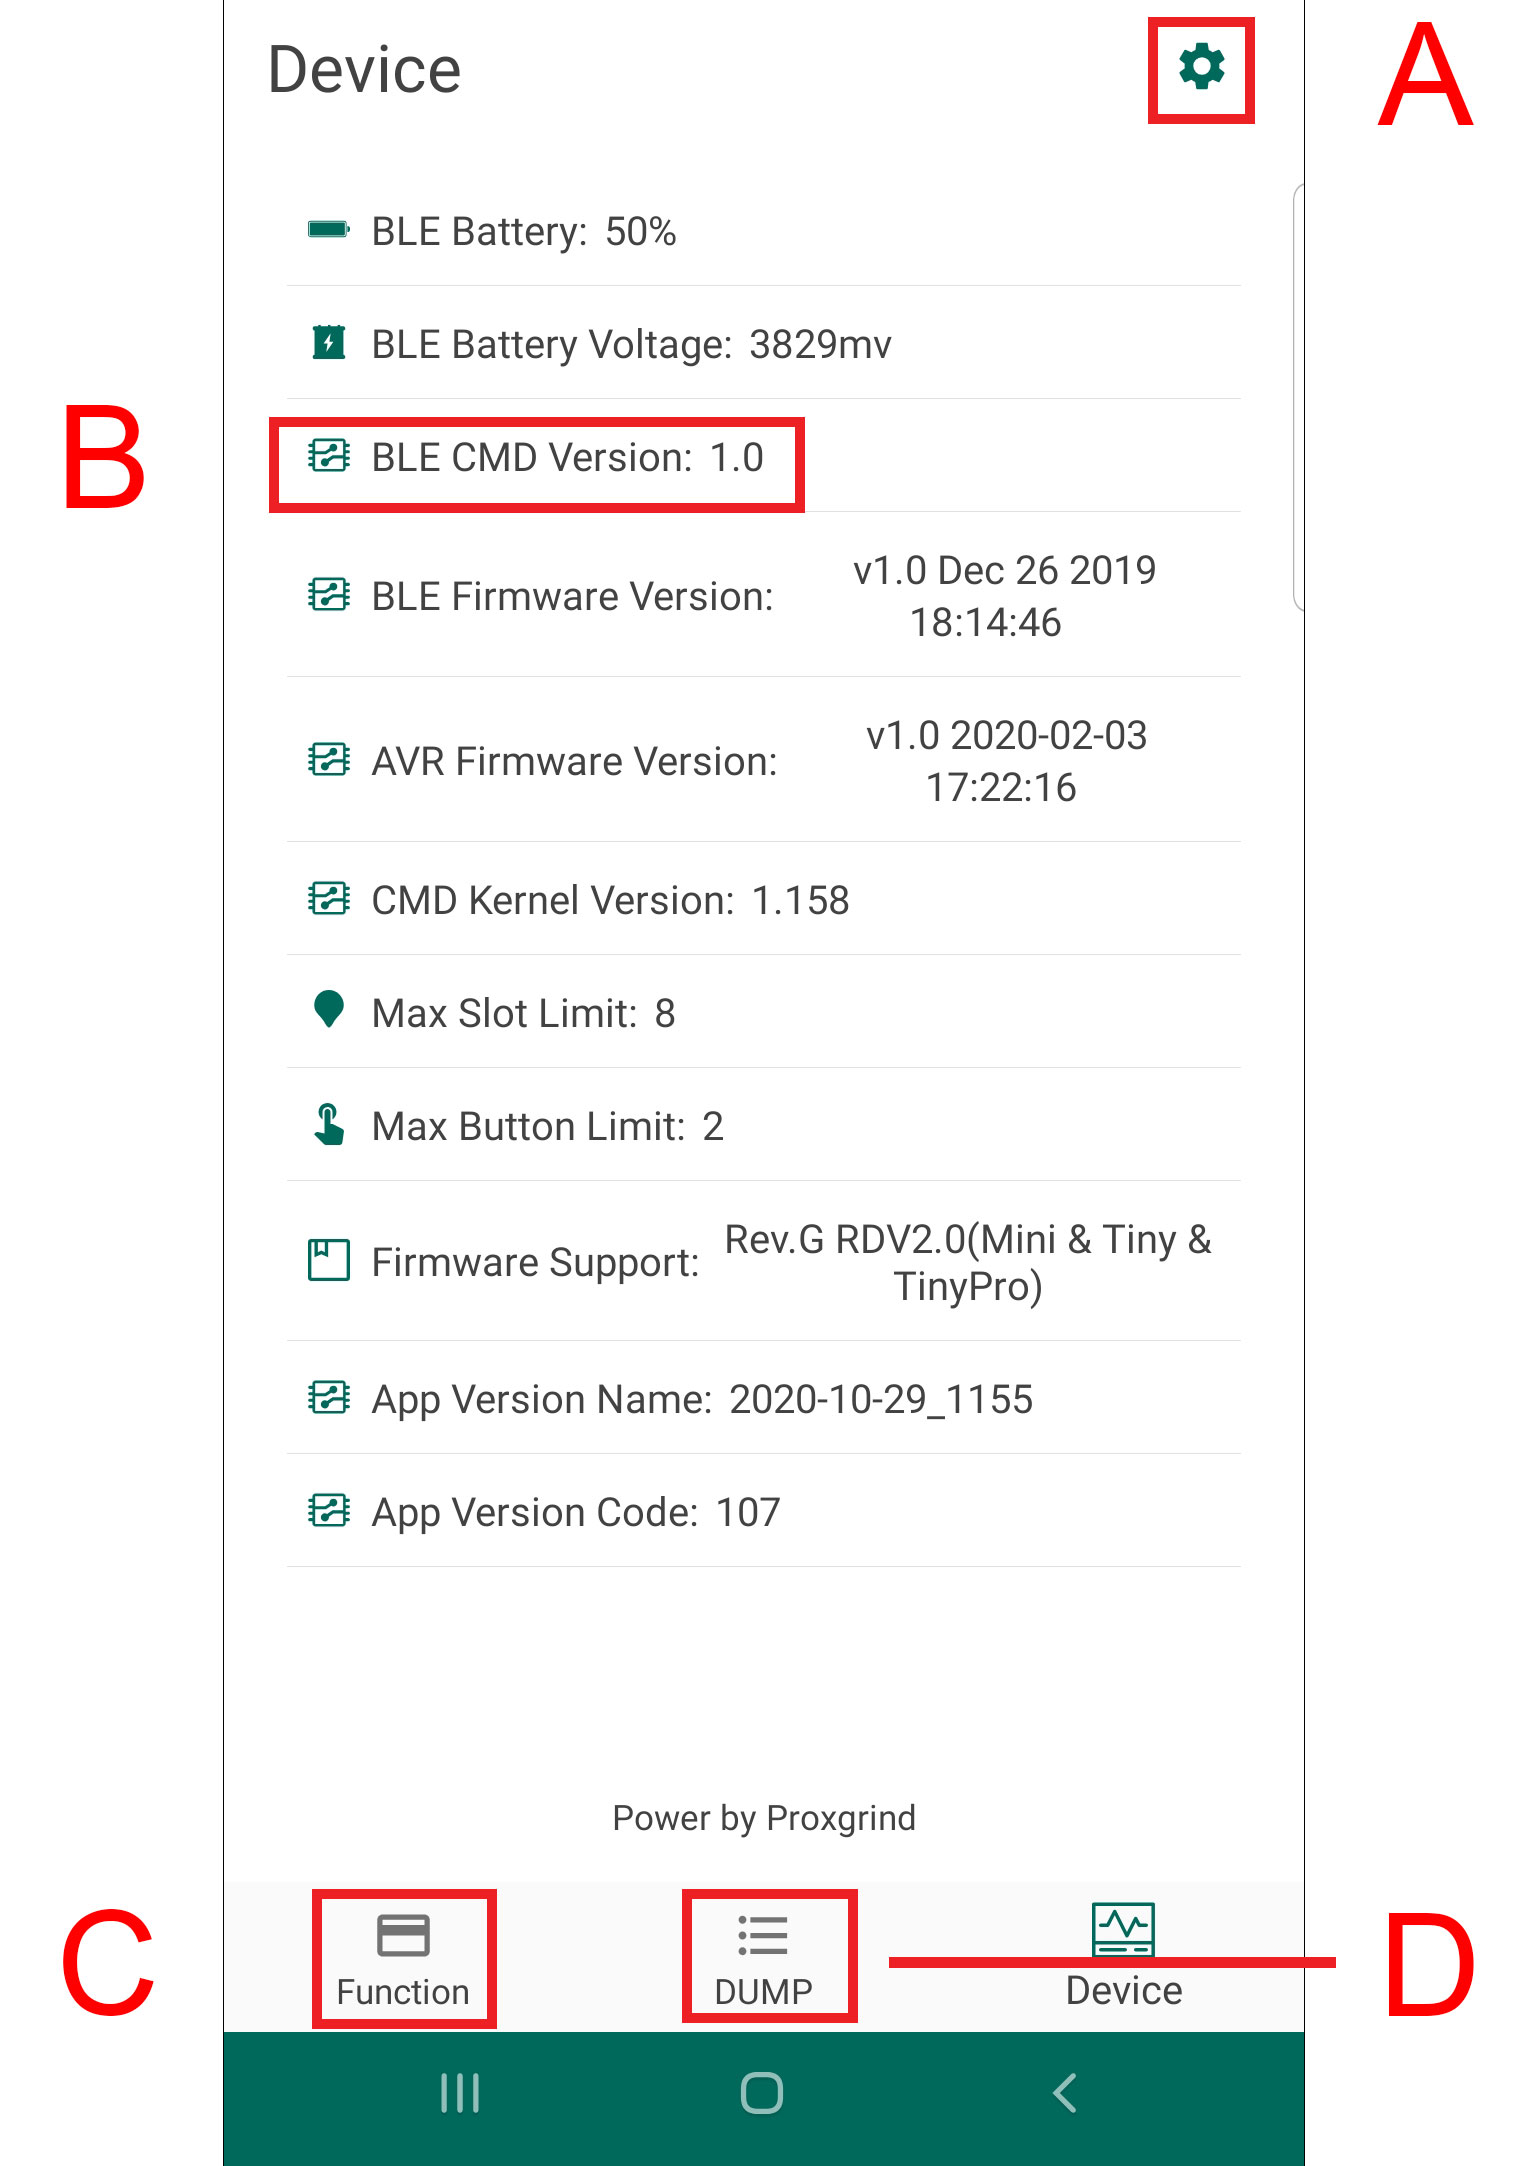
Figure 6 - Device Screen - A) Go to Device Settings; B) Device Firmware Options; C) Go to Home/Function Screen; D) Go to Dump Screen
The app provides push-button management of card dump files, downloading and saving from card data to your Android device’s memory for storage and later use in emulating or further processing the extracted data. The ability to recall and upload card dumps from your Android device directly to the Chameleon Tiny Pro allows for a virtually infinite digital key collection that can be rapidly applied in the field with ease and discretion.
The menu tray at the bottom of the app interface includes three icons that allow the user to switch from the Home Screen UI to the Dump Screen and Device Screen as well. From the dump screen, the user is able to browse and select from the dump files created by and loaded to the app. From here, you can inspect the individual memory blocks of a dump file as well as uploading these files to the Chameleon Mini itself directly from this interface.
The last panel of the UI is the Device Screen, which provides data about the hardware and firmware specifications of the Chameleon Tiny you are currently connected to. The app settings can also be accessed from this screen by tapping the gear icon in the top right. Here you have a the ability to rename the individual Chameleons in your collection with unique device tags, as well as customizing the slot labels, and even changing the color scheme of the interface from light to dark. Most importantly, this is where you can toggle the dump file format from binary to hex.
Flashing Firmware in the App
Managing the firmware of your device is a breeze using the RRG app and can keep you device up to date with the latest commits at the push of a button. The app even allows you to browse from and select any other fork of the firmware you have stored to your Android device, in case you needed to use some legacy or experimental build.
When connected to the device, simply navigate to the device screen. Although it may not look like it, the third item on this list is actually a button – double-tapping the BLE CMD VERSION will bring up firmware management interface. Just tap the Automatic Upgrade button to flash the latest version to your device wirelessly via the BLE module. The process will be complete with a minute or so, simply restart the device and reconnect to the app when it’s done.
Note that you will no longer be able to use your device with the Android app if you choose to flash a version of the firmware that is not supported by the app – which would include the official emsec repo for the Chameleon Mini. Again, refer to the Linux/Windows workflow to revert to the correct build.
This concludes our overview of setting up the Chameleon Tiny Pro with the RRG Android App – stay tuned as we venture into tradecraft techniques for cloning, sniffing, and cracking MiFare cards using this powerful and user-friendly RFID tool. If you still don’t have a Chameleon Mini of your own, make sure to visit HackerWarehouse.com, North America’s exclusive distributor of the Tiny Pro by RFID Research Group. Until then, keep it between the laws and keep it between the LOLs.