When you receive the Chameleon Tiny Pro by RFID Research Group, the device will come pre-loaded with the most recent RRG firmware as of the date of manufacture. This is a fork of the official Chameleon Mini repository maintained by emsec, and is exactly the same as that of its older brother, the Chameleon Mini RevG RDV2. Though this fork is specifically designed for the RRG hardware and its additional BLE module, it is cross compatible with other variations of the device, and the Tiny Pro hardware can run the official branch firmware as well. The project is regularly updated by the dozen or so major contributors active across the various branches – iceman of Proxmark3 fame maintains an experimental branch of the firmware when not contributing to the RRG fork. As of the time this article was written, the most recent build was committed on February 2, 2021, with new commits occurring every month or so. Due to the fast pace of research and development in RFID/NFC security, users will want to regularly monitor the repos and update their firmware to make sure you are taking full advantage of the device.
The primary advantage in using the Chameleon Tiny Pro over any other hardware variant on the market is the wireless connectivity afforded by the BLE module in the device, its compatibility with the RRG Chameleon Android App, and the incredibly small size. These three factors allow for the most discreet use in the field, making it more attractive for live engagements and other red team activities. In the procedures below, you will learn how to manually flash firmware to your Tiny Pro in Linux and Windows environments – these procedures generally extend to any variation of firmware and hardware, but make sure to read the documentation for your particular build before proceeding. We will be using the firmware found in RRG’s repo for this demonstration – https://github.com/RfidResearchGroup/ChameleonMini.
The Chameleon Tiny Pro uses the exact same code repo as its older brother, the RevG RDV2. The device will be identified as a Chameleon Mini in both Linux and Windows environments, so do not be concerned that you have flashed the wrong firmware or otherwise done something incorrectly.
Set Up and Flashing Firmware in Linux
NOTE: Many Linux users encounter a variety of errors when attempting the flashing process as prescribed, especially in Debian/Ubuntu environments – this is a known issue and there are many examples of specific errors and solutions/workarounds suggested in a multitude of forums in the RFID community. Do not get too frustrated in your attempt to make this work, as many users (including this researcher) find that using a Windows system to update their Chameleon Tiny is easier than troubleshooting in Linux. Note that you can still interact with your device in Linux regardless of how the firmware is flashed.
Before attempting the firmware flashing process in Linux, you are going to want to make sure that you have avrdude installed on your system. Open a terminal and execute the command below:
sudo apt-get install avra avrdude
You may need to do the same for socat if it is not already installed on you machine. Once the install process is complete, move onto cloning the firmware from the GitHub repositiory:
git clone https://github.com/RfidResearchGroup/ChameleonMini
With the directory now copied to your system, connect the device via USB cable while holding the button labelled “B” to trigger the Chameleon Tiny’s bootloader mode.

Figure 1 - Press the B button while plugging in via USB to initiate bootloader.
From here, navigate to the directory containing the latest .hex and .eep files – in the current build of the firmware, this can be found in the folder called Chameleon AVR Firmware 20200203.
cd ChameleonMini-proxgrind/REV.G User Manual 20200309/Chameleon AVR Firmware 20200203
Next, run avrdude to flash the firmware to your device using the following command:
sudo avrdude -c flip2 -p ATXMega128A4U -B 60 -P usb -U application:w:Chameleon-RevG.hex:i -U eeprom:w:Chameleon-RevG.eep:i
Once the program completes the flash process and returns the success message, simply unplug your Chameleon Tiny from the USB port and plug it back in to restart the device running the updated firmware. Don’t panic if this doesn’t work for you the first time, or the nth time for that matter – you can do it easier in Windows anyway.
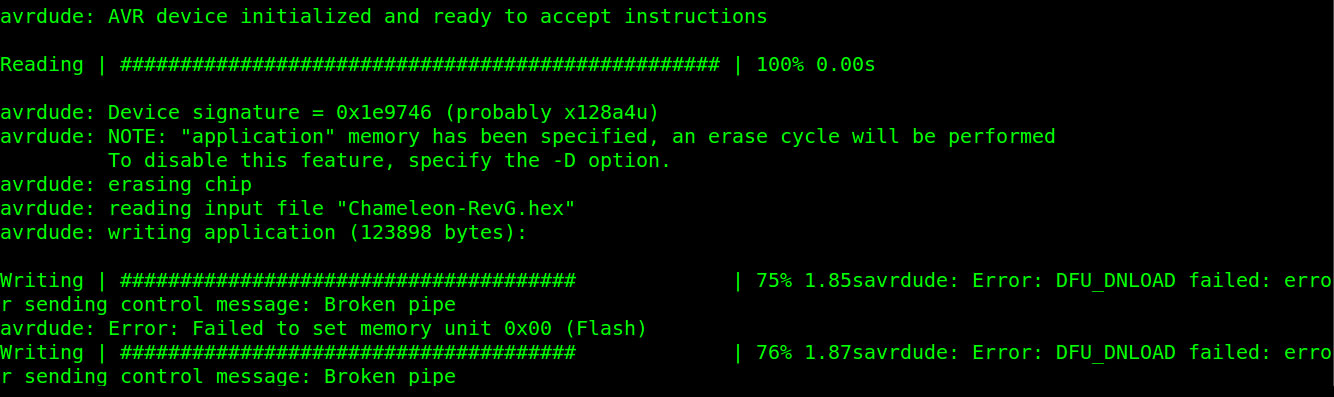
Figure 2 - Running this command may not always yield successful results.
To interface directly with the device via your Linux system, simply open up a terminal with the Chameleon connected via USB. From here, run the following command to open a teletype connection with the firmware and you’re up and running:
socat - /dev/ttyACM0,crnl
Verify that you are running the correct firmware by running the following command:
VERSION?
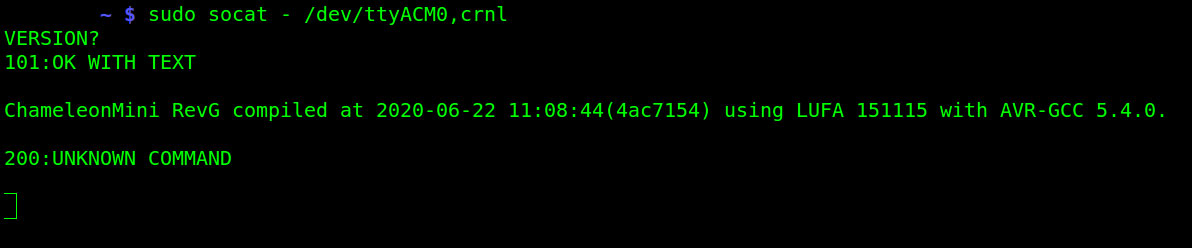
Figure 3 - Connecting to the Chameleon via terminal.
If you have other ACM devices already connected to your system, use grep to identify the correct device path.
sudo dmesg | grep -i usb

Figure 4 - Identifying your Chameleon in Linux.
The Chameleon Tiny has its own unique command structure that will require some research and practice on the part to become proficient with the device. The GUI available through the RRG Android App drastically simplifies the operation of the RevG and might be a better place for absolute beginners to start, but there is an excellent doxygen manual from the official branch located in the Doc directory as well as a crash course summary of device functionality specific to the RDV2 included in the RRG repo.
Set Up and Flashing Firmware in Windows
To get started with the Chameleon Tiny Pro in you Windows environment, you are going to need to download and install a few programs and device drivers used in the flashing process. Beginning with the firmware, visit the RRG Chameleon Mini repository page on GitHub and click the green Code button to download the zip file and extract this to a directory of your choosing. From here you are going to need to download and extract DFU Programmer for Windows and within that file directory, locate and install the driver atmel_usb_dfu.inf to your system. There will be a file called dfu-programmer.exe in the root of this folder, select and copy this file.
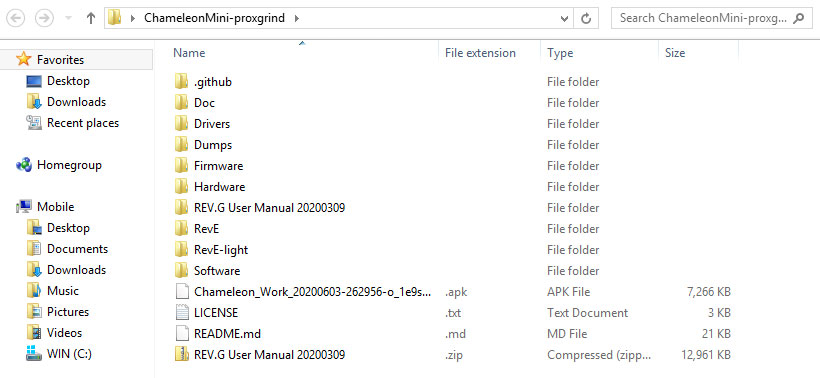
Figure 5 - Chameleon Mini Proxgrind/RRG Firmware Directory
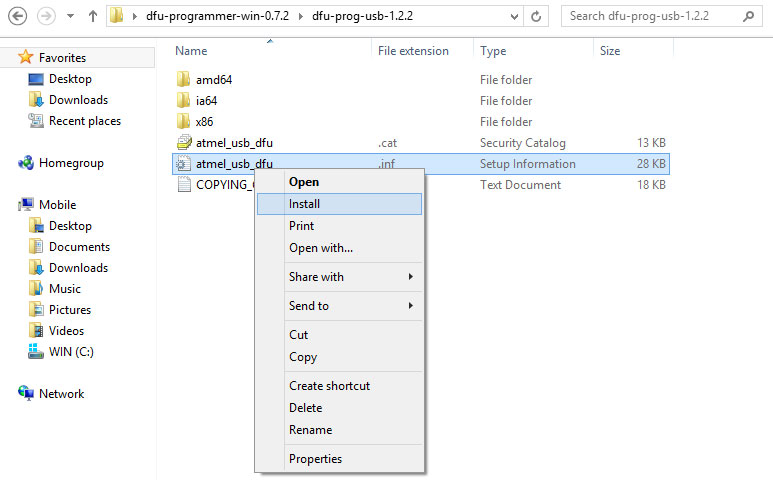
Figure 6A - Installing DFU Drivers
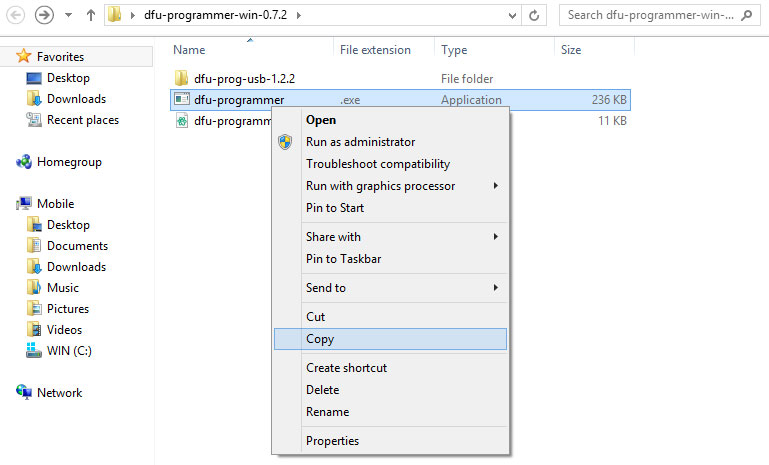
Figure 6B - Extracting and Relocating DFU-Programmer
Now navigate into the Chameleon Mini directory and extract the zip file labelled REV.G User Manual, inside you will find a folder called Chameleon AVR Firmware. Paste the copy of dfu-programmer.exe in this folder. You will now duplicate that procedure by locating and copying the file ChameleonFirmwareUpgrade.bat to this directory. Once complete, there should be a total of four files in this folder: a .hex, a .eep, a .bat, and a .exe.
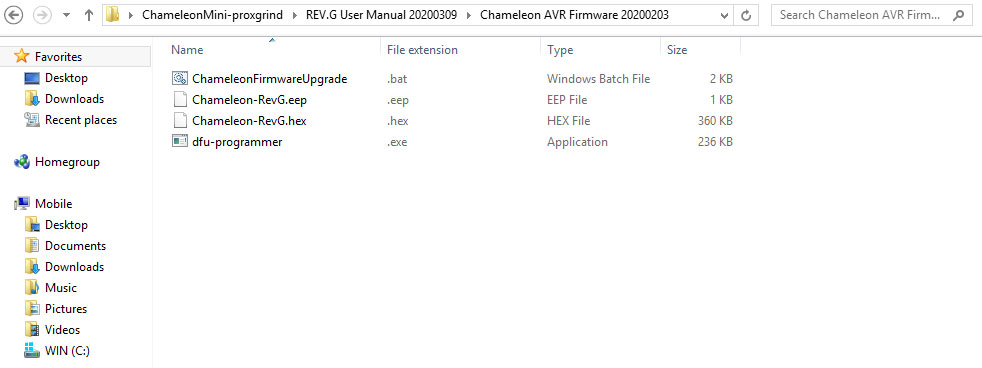
Figure 7 - Chameleon AVR Firmware Directory
Now that your directory is prepared to run the flashing program, connect your Chameleon Tiny to your system via USB cable while holding the button labelled “B” on the device to trigger the bootloader. Run ChameleonFirmwareUpgrade.bat as Administrator. One of the LEDs on the other side should light up green when the firmware has successfully flashed to the device. Finally, go to the Drivers folder in the Chameleon Mini directory and install the files labeled ChameleonDriver.inf and ChameleonDriver.cat before unplugging and reconnecting the device to restart it. The device is now updated and ready to use with your Windows environment.
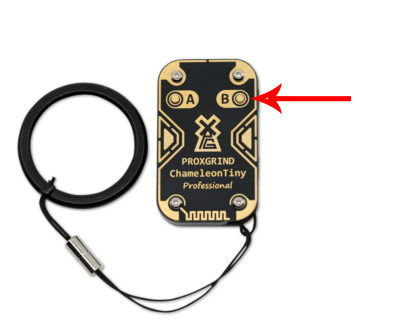
Figure 8A - Press the B button while plugging in via USB to initiate bootloader.
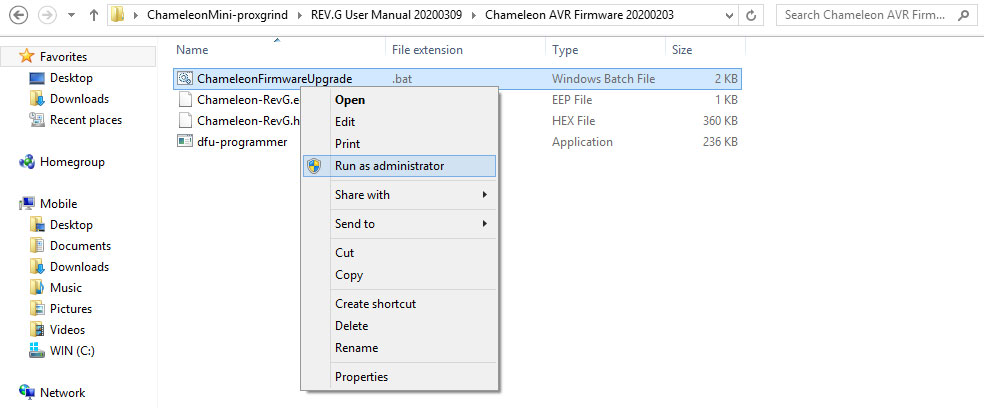
Figure 8B - Run the Chameleon Firmware Upgrade Batch File
In Windows you can connect to the Chameleon Tiny’s firmware via a terminal emulator like TeraTerm. To do this, all you need to do is go to the device management portion of the control panel and identify the com port number associated with your Chameleon Tiny. Then simply run TeraTerm and connect to the appropriate com port and you are up and running. The device uses the same command structure regardless of your OS environment.
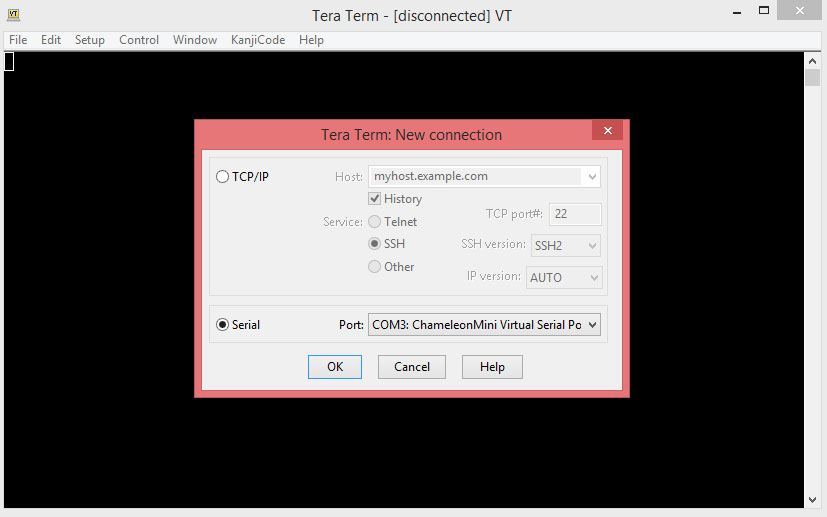
Figure 9 - Connecting to the Tiny Pro via Tera Term
For users less experienced in command-line applications, the RRG repo includes a copy of the Chameleon Mini GUI. This program was made by iceman and replicates the workflow of the android app in a Windows environment, making use of the device a bit more intuitive. This application can be found within the REV.G User Manual folder, simply locate Chameleon Mini Rebooted GUI.exe and run the program.
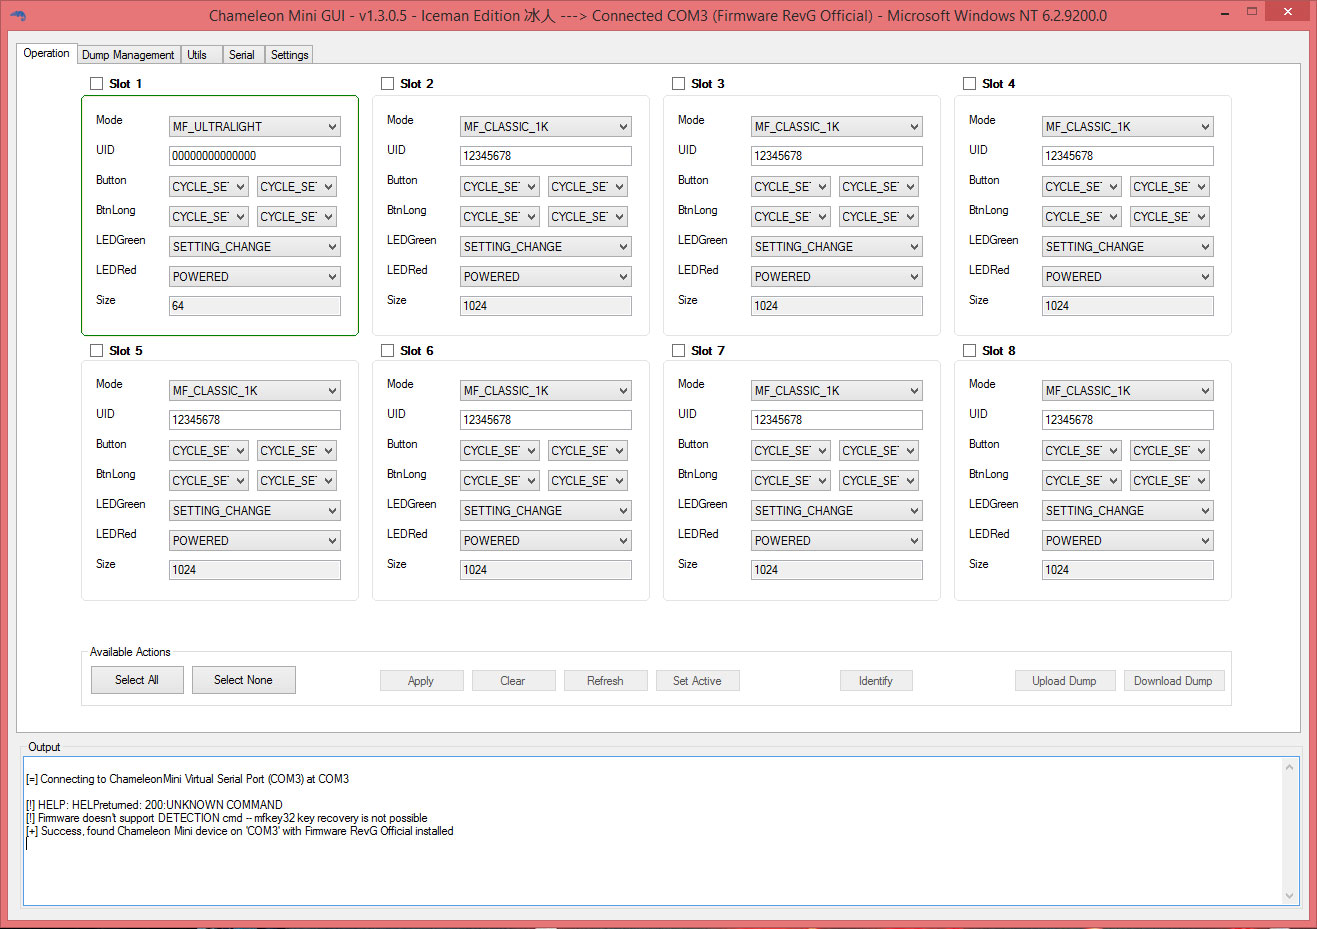
Figure 10 - Connecting to the Tiny Pro2 via the Iceman GUI
From hardware capability to device accessibility, the Chameleon Tiny Pro by RRG provides cutting-edge firmware compatibility for veteran users and beginners alike. If you have not yet acquired a Chameleon Tiny for you RFID lab or physical security engagements, visit Hacker Warehouse, exclusive North American distributor for RRG. Stay tuned for our next article, setting up the Chameleon Tiny in Android. Until then, keep it between the laws and between LOLs.