A brand new variation of the Proxmark coming to market isn’t always news worthy, but in summer of 2021, Nikola T. Labs released the iCopy-X as the first consumer-oriented device to employ the PM3’s powerful suite of capabilities. With a fully-integrated GUI, D-pad style controls, and internal power supply, the iCopy-X makes reading, writing, and emulating RFID tags easy for even the least technologically-inclined user. In this article, we will be taking a look at everything the device has to offer and exploring its potential uses in information security applications.
Device Origins
The iCopy-XS represents the latest iteration of Nikola T. Labs’ iCopy product line, an RFID copier developed and marketed toward locksmiths. Documentation on the original version of their product are all but non-existent, but the company provides a very in-depth look into the technical development of the iCopy-X on their Kickstarter page. The new device is built directly on top of the Proxmark3 project, and runs a fork of the official firmware behind the proprietary software that drives the UI and automation.
Though they are not the first to attempt to streamline the use of the PM3 and make it accessible to novice RFID hackers, Nikola T. Labs has succeeded where others have failed in leveraging the full capabilities of the device without needing to use the client terminal. The iCopy-XS is a standalone device and allows the user to start cloning almost any RFID tag/card in the wild right out of the box with zero setup and zero training.
Not Designed FOr PenTesting
The iCopy-XS is not marketed by the creators as an InfoSec or pentesting device, but seems to be positioned more towards consumers in the property management and hospitality industries. This end user informs many of the hardware and software design choices made by Nikola T. Labs, from the relatively chunky and rugged form factor to the ultra-simple push-button UI. That said, the iCopy is mostly a Proxmark3 under the hood, and experienced users will find a majority of their capabilities intact with this device, and maybe even a few new ones to add to their repertoire.
Device Load out
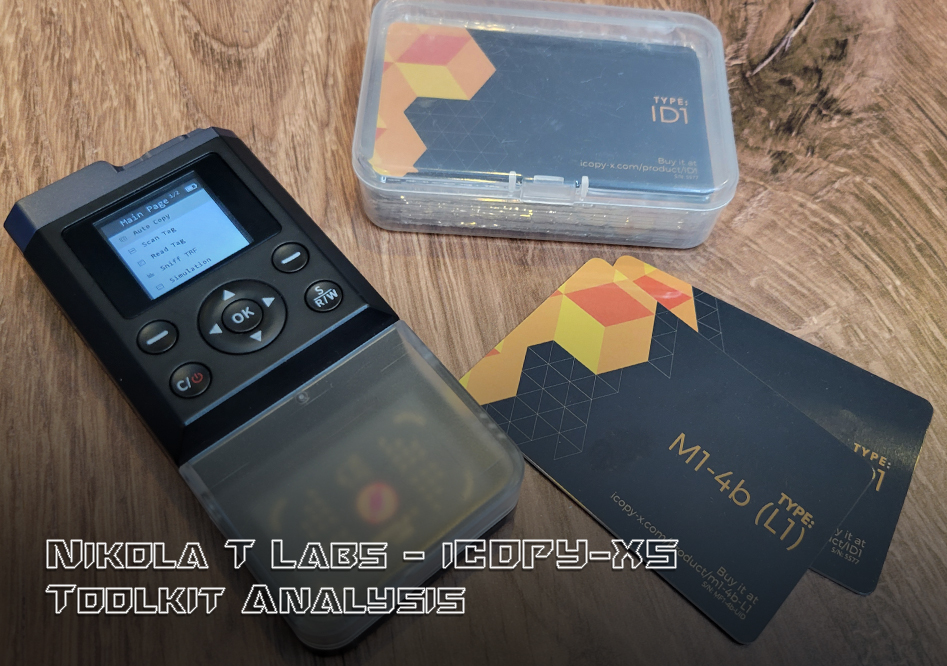
Inside its slick orange and black packaging, you will find the iCopy-XS itself, a printed user manual, a lanyard, and a pack of 16 different re-writable RFID cards – everything that you will need to get started with the device. The card pack includes: 4x Mifare Classic 4-byte compatible Gen1 Cards (M1-4B L1), 4x Mifare Classic 4-byte compatible Gen2 Cards (M1-4B L2), 4x Mifare Classic 4-byte compatible Gen2a Cards (M1-4B L3), and 4x T5577 Cards (ID1).
Device Performance
Physical Dimensions
The device itself is about 2.5 inches wide, 5 inches long, 1 inch in height, and weighs in at just over 4 ounces. The combination of aluminum and high-density plastic enclosure feels sturdy in one’s hand and features a textured surface with indentations for better gripping on either side. The internal antenna is slightly exposed by a thin plastic shell and features a removable clear plastic cover to keep it protected while being stored or otherwise not in use.
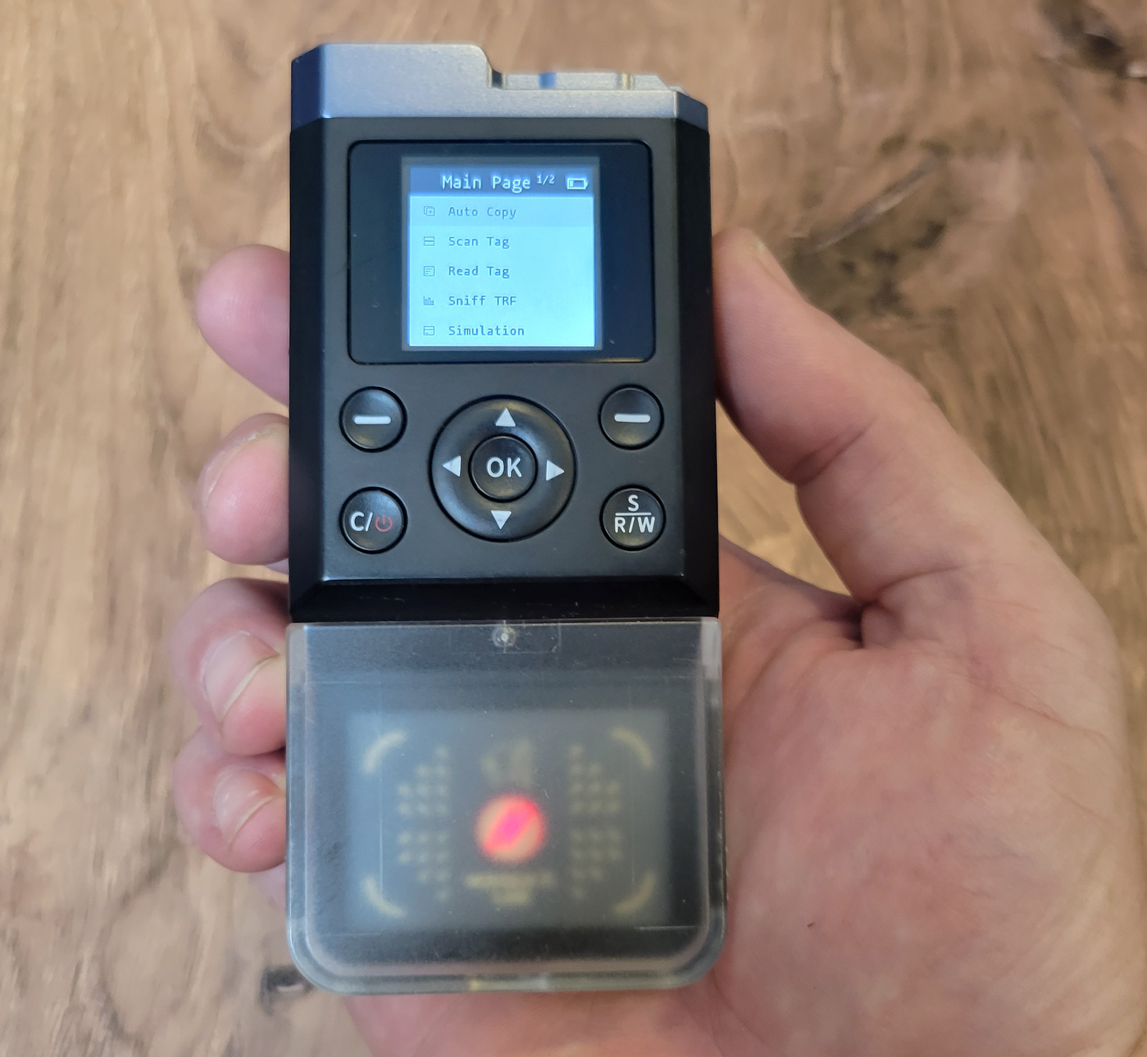
Figure 1B: Comfortable hand-held form factor
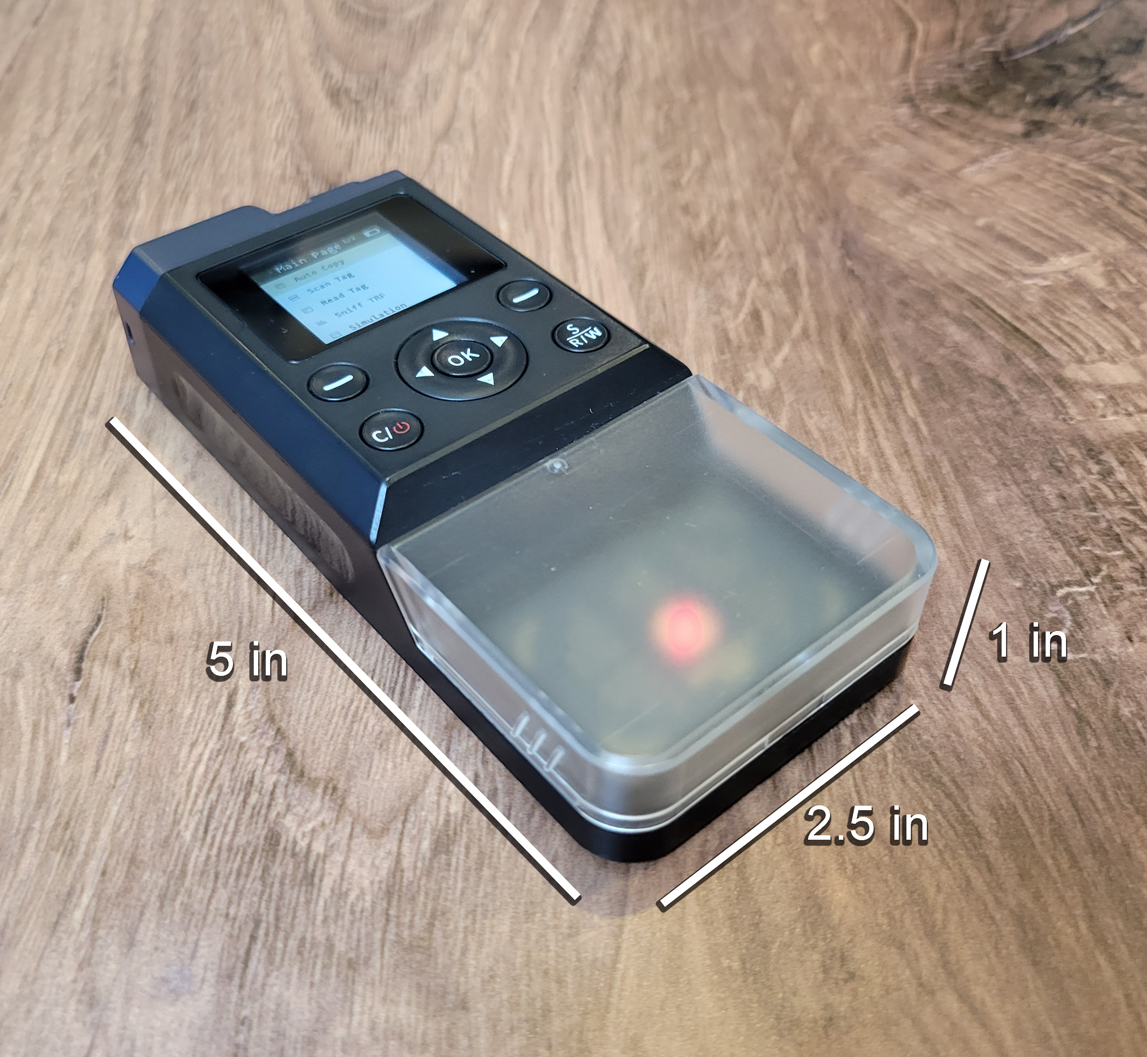
Figure 1A: iCopy-XS physical dimensions
UI Interaction
The UI is comprised of a 1 x 1.25 inch color LED screen and a small collection of buttons of the top of the device. In the center of the buttons is a D-pad style input for toggling up and down, as well as backwards and forwards through the UI menu displayed on the LED screen. To the top right and top left of the D-pad are two buttons labeled “-” and are used to select between functions displayed in the lower right and left corners of the screen in certain modes of use. To the lower left of the D-pad is the power/clear button and on the opposite side is a button used to trigger the Auto-Copy functionality from the primary menu.
| Primary Menu | |
|---|---|
| Label | Function |
| Auto Copy | Automatically scan, read, and clone RFID tag |
| Scan Tag | Scan and emulate RFID tag |
| Read Tag | Read tag data by tag type |
| Sniff TRF | Sniff RFID reader by protocol type |
| Simulation | Simulate tag by type and UID value |
| PC-Mode | Read MiFare Classic 1K |
| Backlight | Toggle backlight brightness |
| Diagnosis | Test hardware functions |
| Volume | Toggle UI volume level |
| About | Access device info and firmware update function |
The LED screen is back lit and easy to read, making useful in both light and dark conditions. The buttons are responsive, well-tensioned, and provide a satisfying click when pressed. The arrangement and use of the buttons is very intuitive and should be instantly navigable to anyone who used technology in the 90s and 2000s.
NO setup required
The iCopy-XS comes fully operational right out of the box without any setup of any kind. Booting up the device takes about 30 seconds, which is exactly as long as it will take to start cloning RFID tags after unboxing. When it comes to user-friendly, the iCopy simply can’t be beat. Even if the device needs updating, flashing new firmware is simple enough for the general consumer to accomplish without fear of bricking the device. More on this topic in the PC Mode section of the article.
Read, write, and emulate RFID TAGS
The iCopy-XS is an all-in-one device that allows the user to read, write, and emulate both low-frequency (LF) and high-frequency (HF) RFID tags. The device is functionally equivalent to the Proxmark3, on which the iCopy was based, and almost all capabilities of the PM3 are available to this device. That said, the onboard UI of the iCopy is optimized almost exclusively for copying tag credentials to another card, with many of the advanced capabilities and features hidden behind “PC-Mode”
Tag Protocols
The iCopy-XS supports over 30 RFID tag protocols, covering almost anything you are likely to find in the wild, from low-security consumer products, to maximum-security commercial systems. See the table below for a complete list:
| Supported RFID Tag Protocols | |
|---|---|
| LF Protocols | HF Protocols |
| EM Marin | Mifare 1K 4 Byte |
| HID Proxmark3 | Mifare 1K 7 Byte |
| HID Indala | Mifare 2K 4 Byte |
| AWD | Mifare Mini 4 Byte |
| IOProx | Mifare 4K 4 Byte |
| GProx | Mifare 4K 7 Byte |
| SecuraKey | Mifare Ultralight |
| Viking | Mifare Ultralight C |
| Pyramid | Mifare Ultralight EV1 |
| FDX-B | NTAG 213/215/216 |
| Gallagher | iClass Legacy |
| Jablotron | iClass Elite |
| Keri | iClass SLI |
| Nedap | iClass SLIX |
| Noralsy | |
| PAC/Stanley | |
| Paradox | |
| Presco | |
| Nexwatch | |
| HiTag* | *read only |
Antenna Range
The iCopy features an internal hybrid LF/HF antenna tuned for 125KHz and 13.56 MHz respectively. The antenna is protected by a clear plastic cover, and although it can be removed, it does not interfere with read and write operations during use. The antenna can read and write up to a distance of 1 inch for most LF tags, and 1.25 inches for most HF tags tested. Although the iCopy is technically capable of interacting with bio-implantable RFID tags, I have not been able to get a valid sub-dermal read with the device. These reads were attempted on a Dangerous Things NeXT and xNT, both located in the webbing between thumb and forefinger.
AUTO-COPY
The iCopy’s Auto-Copy function is pretty much it’s killer application. This one command will scan, read, decrypt, and then write a target card to a blank or re-writable tag. The decryption is entirely automated by the software and is reliable for a majority of tag protocols in the wild and can even perform a NESTED ATTACK without any additional user input.
Once the device is turned on, it will boot up to the primary menu with Auto-Copy selected. All the user has to do is place a target RFID tag onto the antenna and press “OK” to start the read/write sequence. The iCopy will start by scanning the tag to determine the protocol, then will proceed to the appropriate deciphering sequence for that tag type. The sequence will automatically escalate its attack vector to overcome standard encryption implementations until the card data is extracted.
From here, simply press “Write” and the UI will prompt the user with the appropriate card type to place on the antenna. Press “Write” again and the tag will be written to the new card, creating an exact copy of the target.
This single function will cover a majority of RFID systems found in the wild, both consumer and commercial, including residential and office access systems, automated parking gates, and NFC tag readers. Though many of these systems support advanced encryption settings, most are implemented with only default configurations.
In the rare case that you do encounter a target card that cannot be deciphered via “Auto-Copy”, the UI will recommend an appropriate escalation of technique, such as scanning other enrolled cards, sniffing readers, or switching to PC-Mode for a Hard-Nested Attack. These workflows are not exactly easy to perform for the uninitiated, but the feedback does put the user on the right track for further research and skill development.
SCAN AND EMULATE
Just like the standard PM3, target cards can be emulated by the iCopy itself without the need to write credentials to a blank card. To utilize this functionality, use the D-Pad to scroll down to “Scan” in the primary menu. Place the target RFID tag on the antenna and press “OK” to scan. Once complete, you will be prompted with the option to “Simulate” using the button on the bottom right of the screen. The device will now interact with RFID readers as if it were the target card until the “Stop” button is pressed.
Though this operation is handy if you have persistent access to the target card, I find the lack of ability to save and recall previously scanned tags directly through the UI a bit frustrating. The device does in fact store these tag values automatically, but the user only has access to this data via “PC-Mode” and thus is not very useful to anyone without PM3 experience. Tag dumps are stored to the “Dump” directory and will be organized by tag type. In my opinion, this data should be accessible via the “Simulate” function, which currently relies on manual UID input by the user.
Setup
The iCopy-XS is designed primarily for standalone use via the onboard UI, but also offers PC-Mode to users in need of a bit more functionality, such as running the Hard-Nested attack, retrieving saved tag dumps, accessing the client software, and updating the firmware. Consistent with their user-friendly approach to design, Nikola T. Labs has made these procedures as easy as possible by including all the tools within the device itself. Simply plug the device into your Windows PC with the included USB cable and select “PC-Mode” from the primary menu – press “OK” and the press “Start”. When PC-Mode is activated, the iCopy appears in your workstation as a disk drive, and all device resources are executable within this directory without any installation or configuration.
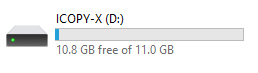
Figure 2A: iCopy-XS drive during PC-Mode
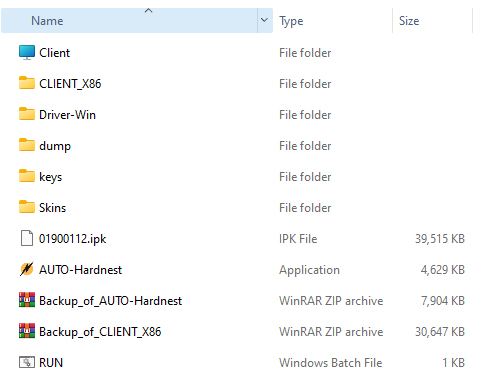
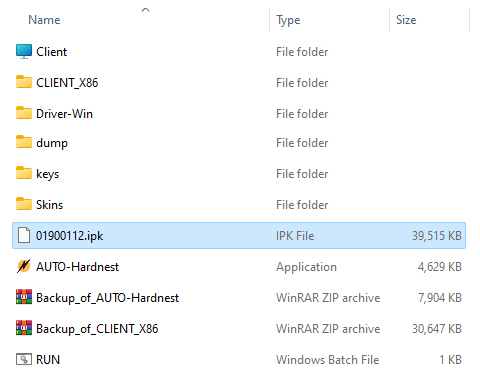
Figure 2B: PC-Mode drive contents
AUTO-HARDNEST
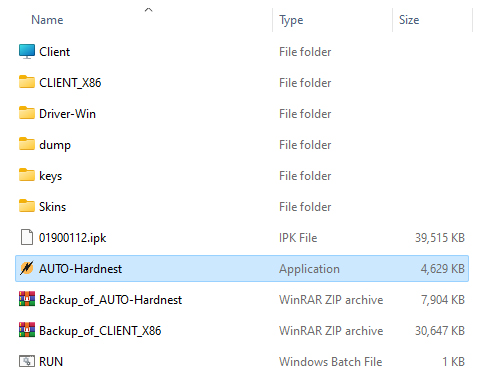
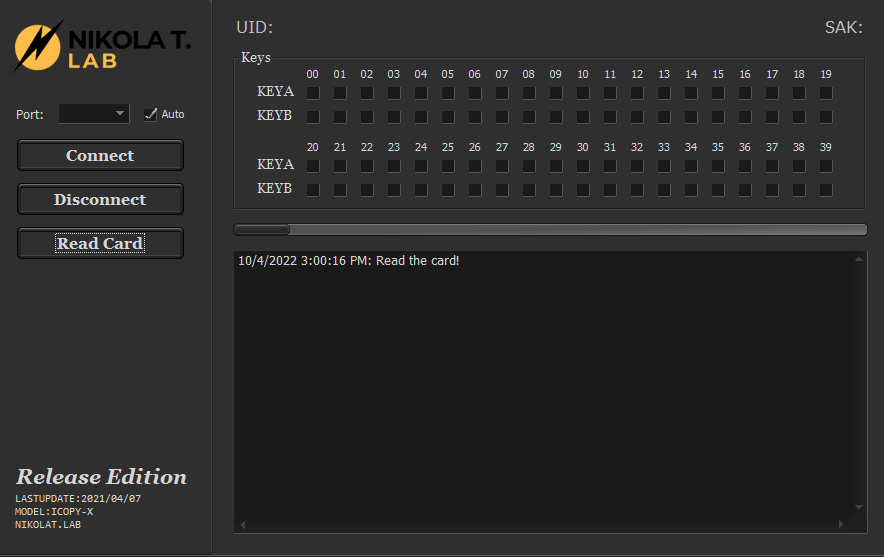
One of the primary reasons an iCopy user will need to interface with the device via PC-Mode is in cracking Mifare tag encryption via the Hard-Nested attack. This attack would normally need to be run manually using the client software, but Nikola T. Labs has written a small piece of software to automate this process. To run the attack, simply put the device in PC-Mode and navigate to the root directory of the iCopy drive. From here, simply run the application called “AUTO-Hardnest” and place the target RFID tag onto the device antenna.
A simple GUI will open up, connect to the device, and run the attack. Deciphered key blocks will be checked off as they are decrypted and when the process is complete, the tag data will be saved to the “Dump” directory. For more information on the Hard-Nested attack, check out our in-depth article here.
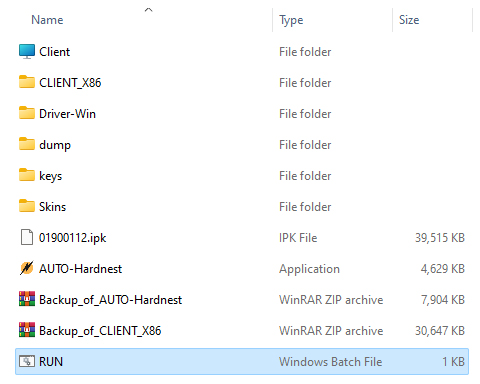
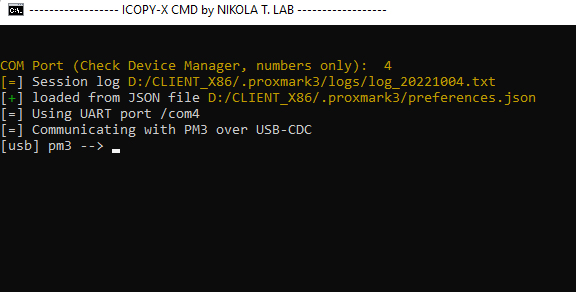
Running the Client
As mentioned several times already, the iCopy is built on top of the Proxmark3 and as such, can be interfaced with Proxmark client software. Although this is not very useful for novices, advanced users will find all their typical hacking and research workflows available here. Accessing the client is as simple as navigating to the root directory of the iCopy drive and executing the “RUN” file. This script will prompt you for the COM port location of the device, and when entered will launch the client software in a terminal window.
The client is essentially the same as the official branch of the Proxmark project, but does represent a novel fork, and will likely drift further and further from the primary project over time. Users more familiar with the RRG/Iceman forks will find some of the bleeding edge capabilities missing, however, and will find the iCopy a somewhat limited when compared to the PM3 RDV4.
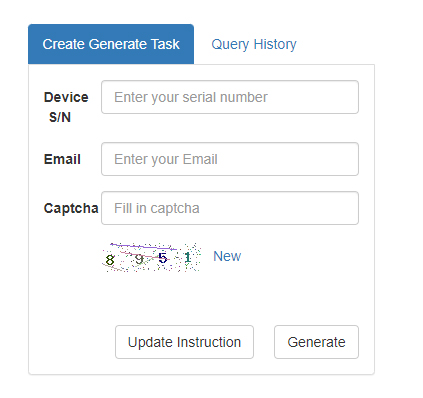
UPDATING FIRMWARE
One of the most user-friendly features included in PC-Mode is the drag-and-drop process of updating the iCopy’s firmware. All the user has to do is download the latest version from Nikola T. Labs by visiting their online firmware generator and entering your device serial number. An IPK file will be compiled for your device and downloaded through your browser. From here, simply delete the IPK file located in the root directory of the iCopy drive and drag in the new file from your download.
Once the file is copied, exit PC-Mode and use the D-Pad to scroll to “About” and press “OK”. Scroll down again to the second page of this menu and press “OK” to start the firmware update. The workflow is pretty much user-proof and eliminates many of the headaches encountered when flashing new firmware to devices manually.
project Development
As stated earlier, the iCopy-XS is essentially built on top of the Proxmark3 hardware and firmware and as such, has a nearly identical set of capabilities as the official project and the current hardware variations available on the market. What Nikola T. Labs has put into the development of this device goes far beyond simply making the device easier to use, such as the Proxmark Pro by Rysc Corp. Instead, the iCopy integrates a very sophisticated logic schema that essentially recreates the workflow of expert RFID researchers and accomplishes highly technical operations with virtually no user input. The interface even features a voice-guided mode, allowing users with visual impairments to navigate the device with ease.
In addition to the high-quality and easy-to-use device GUI, the iCopy-XS can be connected via PC Mode to a Windows machine via USB, giving you access to the device’s file system – which includes the software necessary to access the Proxmark client for advanced research applications. Even updating the firmware is as simple as copying the latest download from Nikola T. labs, placing the files in the appropriate directory, and rebooting the device. In this way, the iCopy truly bridges the gap between novice and advanced users without sacrificing any of the current functionality and capabilities of the Proxmark3.
Sadly, the iCopy’s firmware is closed-source and thus not positioned for the kind of community development that has driven the long-lasting growth and success of the Proxmark3 project. This makes the device very unlikely to benefit from any significant development outside of Nikola T. Labs itself, leaving it prone to deprecation as the general RFID community evolves. That said, the company seems to have long-term plans for firmware upgrades and hardware additions to keep the device competitive in this space.
Conclusion
Though easy enough for a child to use, the iCopy-XS has an even higher price tag than the PM3 RDV4. But the value proposition for this device is not limited to beginner friendly UIs and push-button card cloning – this is a serious device capable of doing heavy lifting in the lab and field. The fact that you can hand it to a team member with no training on the device and get expert-level results is just the cherry on top of an extremely well-executed product. Even seasoned users of the Proxmark3 RDV4 should consider adding the iCopy to their toolkit.
The only real downsides to the iCopy-XS over the PM3 RDV4 is that lack of wireless connectivity and its somewhat clunky form factor. Similar to Proxmark Pro, this device has the potential to attract attention to the user when using it in field engagements, as they will be forced to be holding a directly interacting with a suspicious piece of tech during operation. When RRG integrated the BLE and app functionality to the RDV4, it became one of the most the most potent RFID tools available to red teamers. This is a substantial oversite on the part of Nikola T. Labs, and I hope to see this possible as a hardware add-on in the future.
Ultimately, the iCopy-XS is an ideal device for anyone who needs access to top-of-line RFID tools without the level of skill to operate a Proxmark3. Though it is unlikely to ever replace the status of the RDV4 among power users and researchers, the iCopy is by far the best option for anyone looking to dive into RFID technology without prior experience. Though the price point is high, the quality of the hardware and all of the software features more than justify the expense for anyone using the device in a professional capacity.
That wraps up our overview of the iCopy-XS by Nikola T. Labs – stay tuned for tradecraft techniques on cloning, sniffing, and cracking RFID cards using this powerful and user-friendly device. If you’re interested in acquiring an iCopy-XS of your own, make sure to visit HackerWarehouse. Until then, keep it between the laws and keep it between the LOLs.